Bus Pirate saves the day! (proxmark3 jtag flashing)
[caption id="attachment_461" align="alignright" width="300"]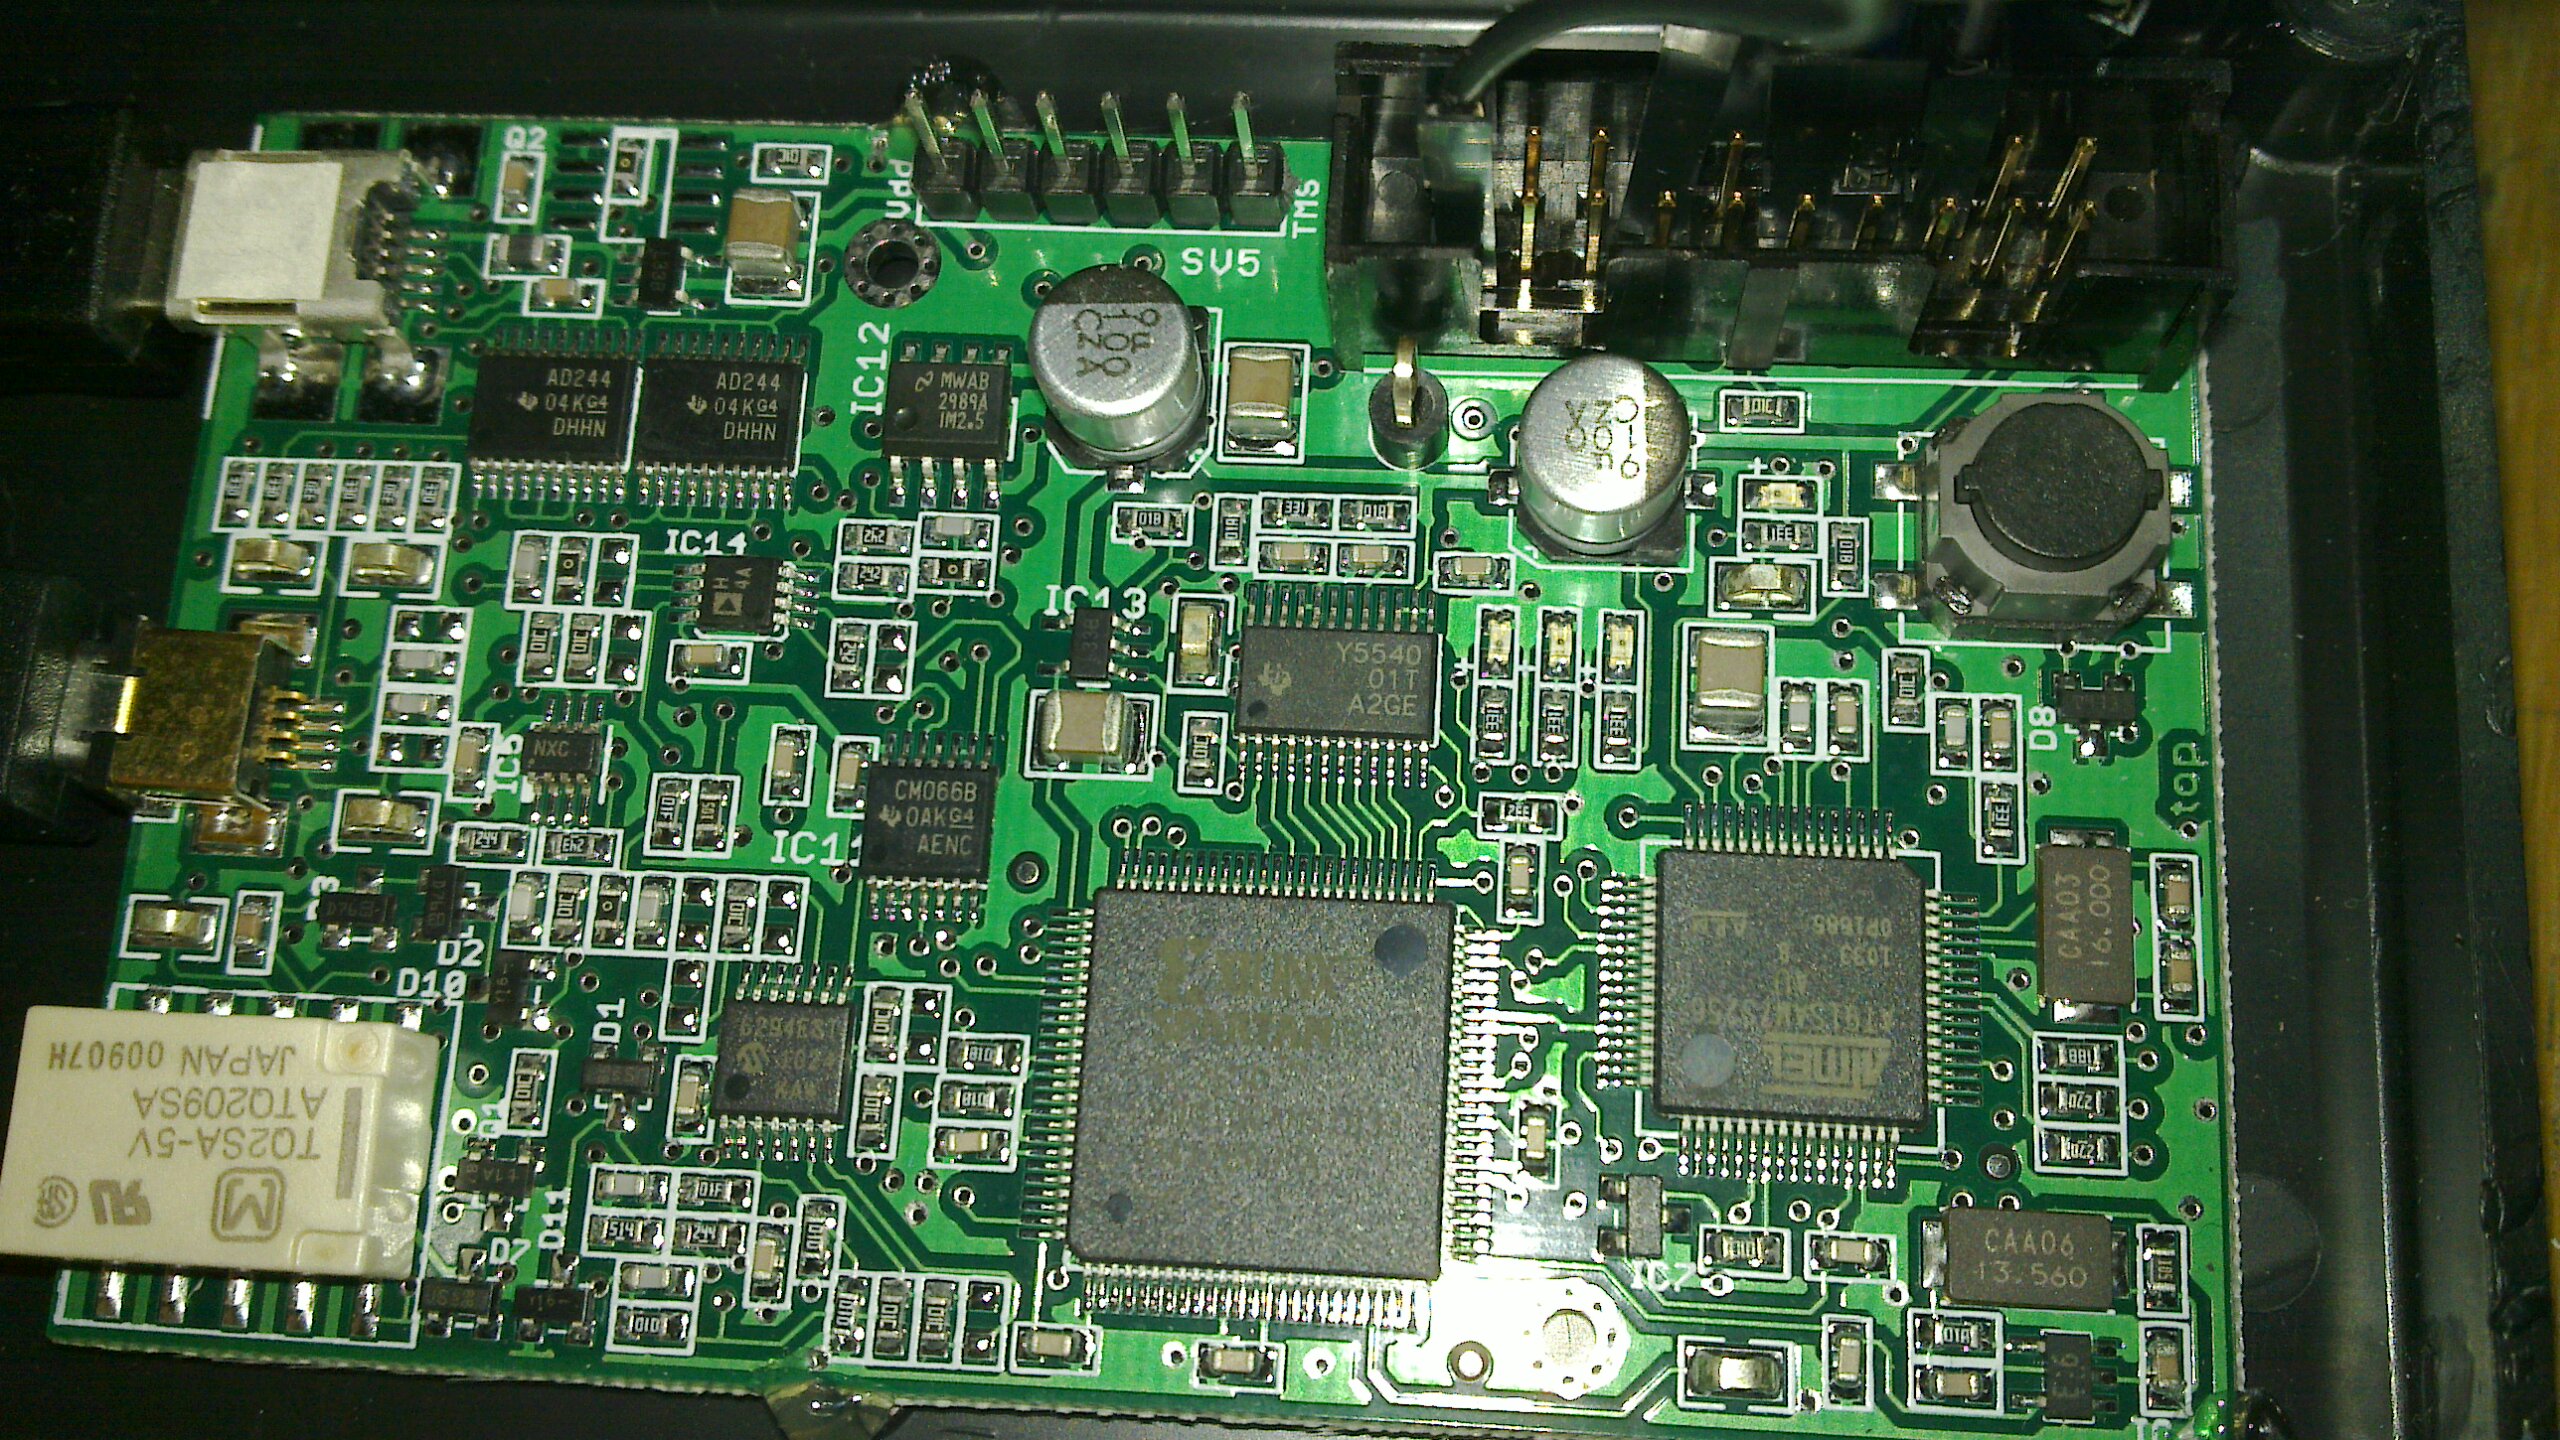 Proxmark3, generally used for wireless snooping of NFC/Mifare communication[/caption]
After clumsily bricking the Proxmark3 bootrom (i.e. the device's bootloader for the AT91SAM7S256 ARM cpu), I was looking for a way to recover the device. The documented procedure in the firmware compilation guide assumed the user to have a Segger J-link and their J-Flash ARM utilities (which in total cost about 10,000 SEK - or 1,500 USD).
That's two months of rent for the hackerspace - I figured I can do better than that. So I made a trip to the internets and researched JTAG programmers, of which there are loads that can handle faster or slower communication with the protocol. In some cases maybe speed is good, such as when debugging or doing things more frequently - but this was a one-time flash occasion - and proprietary JTAG programmer felt far too restricted and expensive.
Sure, there are cheap, hackable alternatives that connect to the parallell port, but that interface is unfortunately of a pretty bygone era. So given that I did not have access to a true parallell port at the time, I had to keep looking for alternatives. Essentially anything that worked with the flashing and debugging utility OpenOCD would be good, and something I could find nearby would be even better! And the OpenOCD list of supported interfaces contained among many others the Bus Pirate, a handy open hardware design that helps hackers with serial communication of just about any kind.
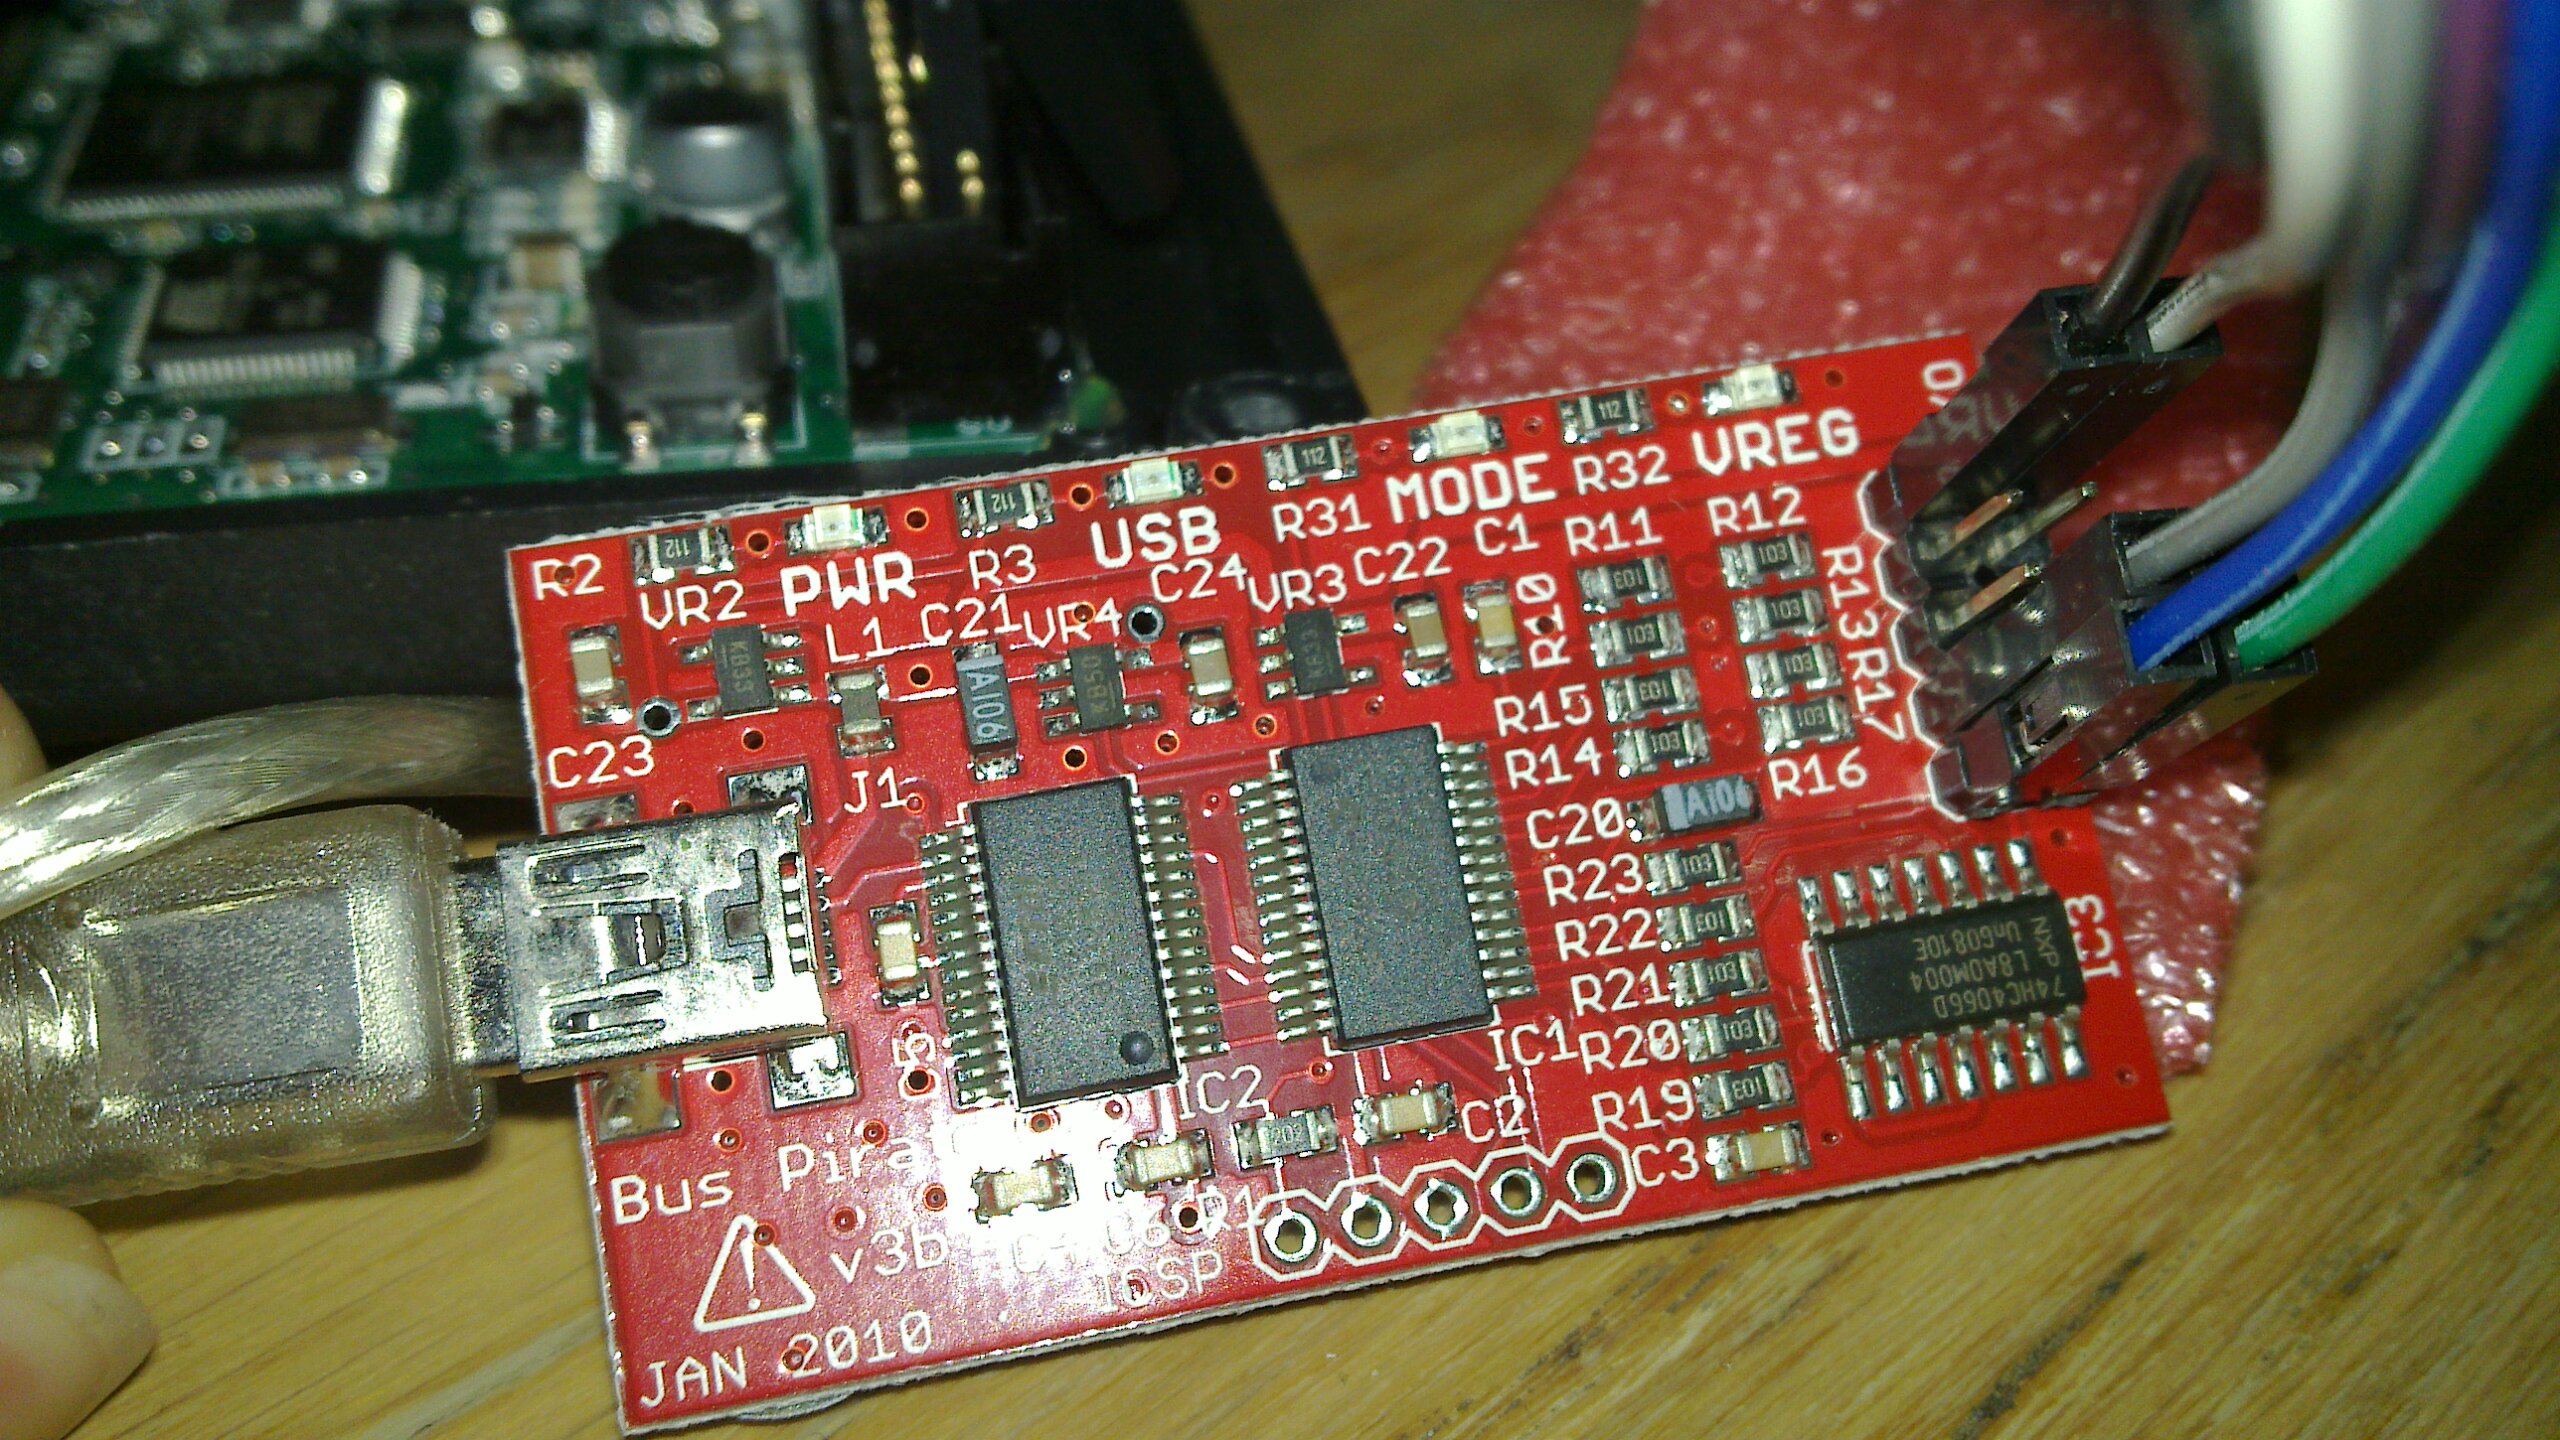
So I managed to find a Bus Pirate in a large pile of electronics. This neat tool has a USB interface and gives you a pin header that can be connected to whatever interface you want, be it UART, SPI, I²C/SMBUS, 1-wire, bit banging... you name it! This includes of course JTAG - and it all basically runs out of the box.
Well, kind of out of the box. I did have to do some research on how to properly communicate specifically with the proxmark3, but essentially all was covered in the OpenOCD at91sam7s512-buspirate.cfg [local copy] from the proxmark3-lcd project. They have also documented the proper command sequence in OpenOCD telnet control, which can be neat to have in handy:
> halt > flash erase_sector 0 0 15 > flash erase_sector 1 0 15 > flash write_image ../armsrc/obj/fullimage.elf > flash write_image ../bootrom/obj/bootrom.elf
All of this works great together, of course assuming one has built OpenOCD with buspirate support and successfully compiled the desired revision of proxmark3 code (together with an ARM toolchain) to get the ELF binaries. Nevertheless, those are no real issues as it's all quality, open source software. The only downside in this mix is that the Bus Pirate isn't quite as quick as, say the Segger J-link, but when we're talking about flashing a couple of hundred kibibytes at the most... Who cares? Just wait a second more - and voilà, a working Proxmark3 again!
If you're not sure how to connect the Bus Pirate to the proxmark3 JTAG interface, have no fear. That was a piece of cake as well. The following image shows the 20-pin JTAG header of the Proxmark3. Pin number 1 is in the corner of the circuit board (pin 20 being closest to the center):
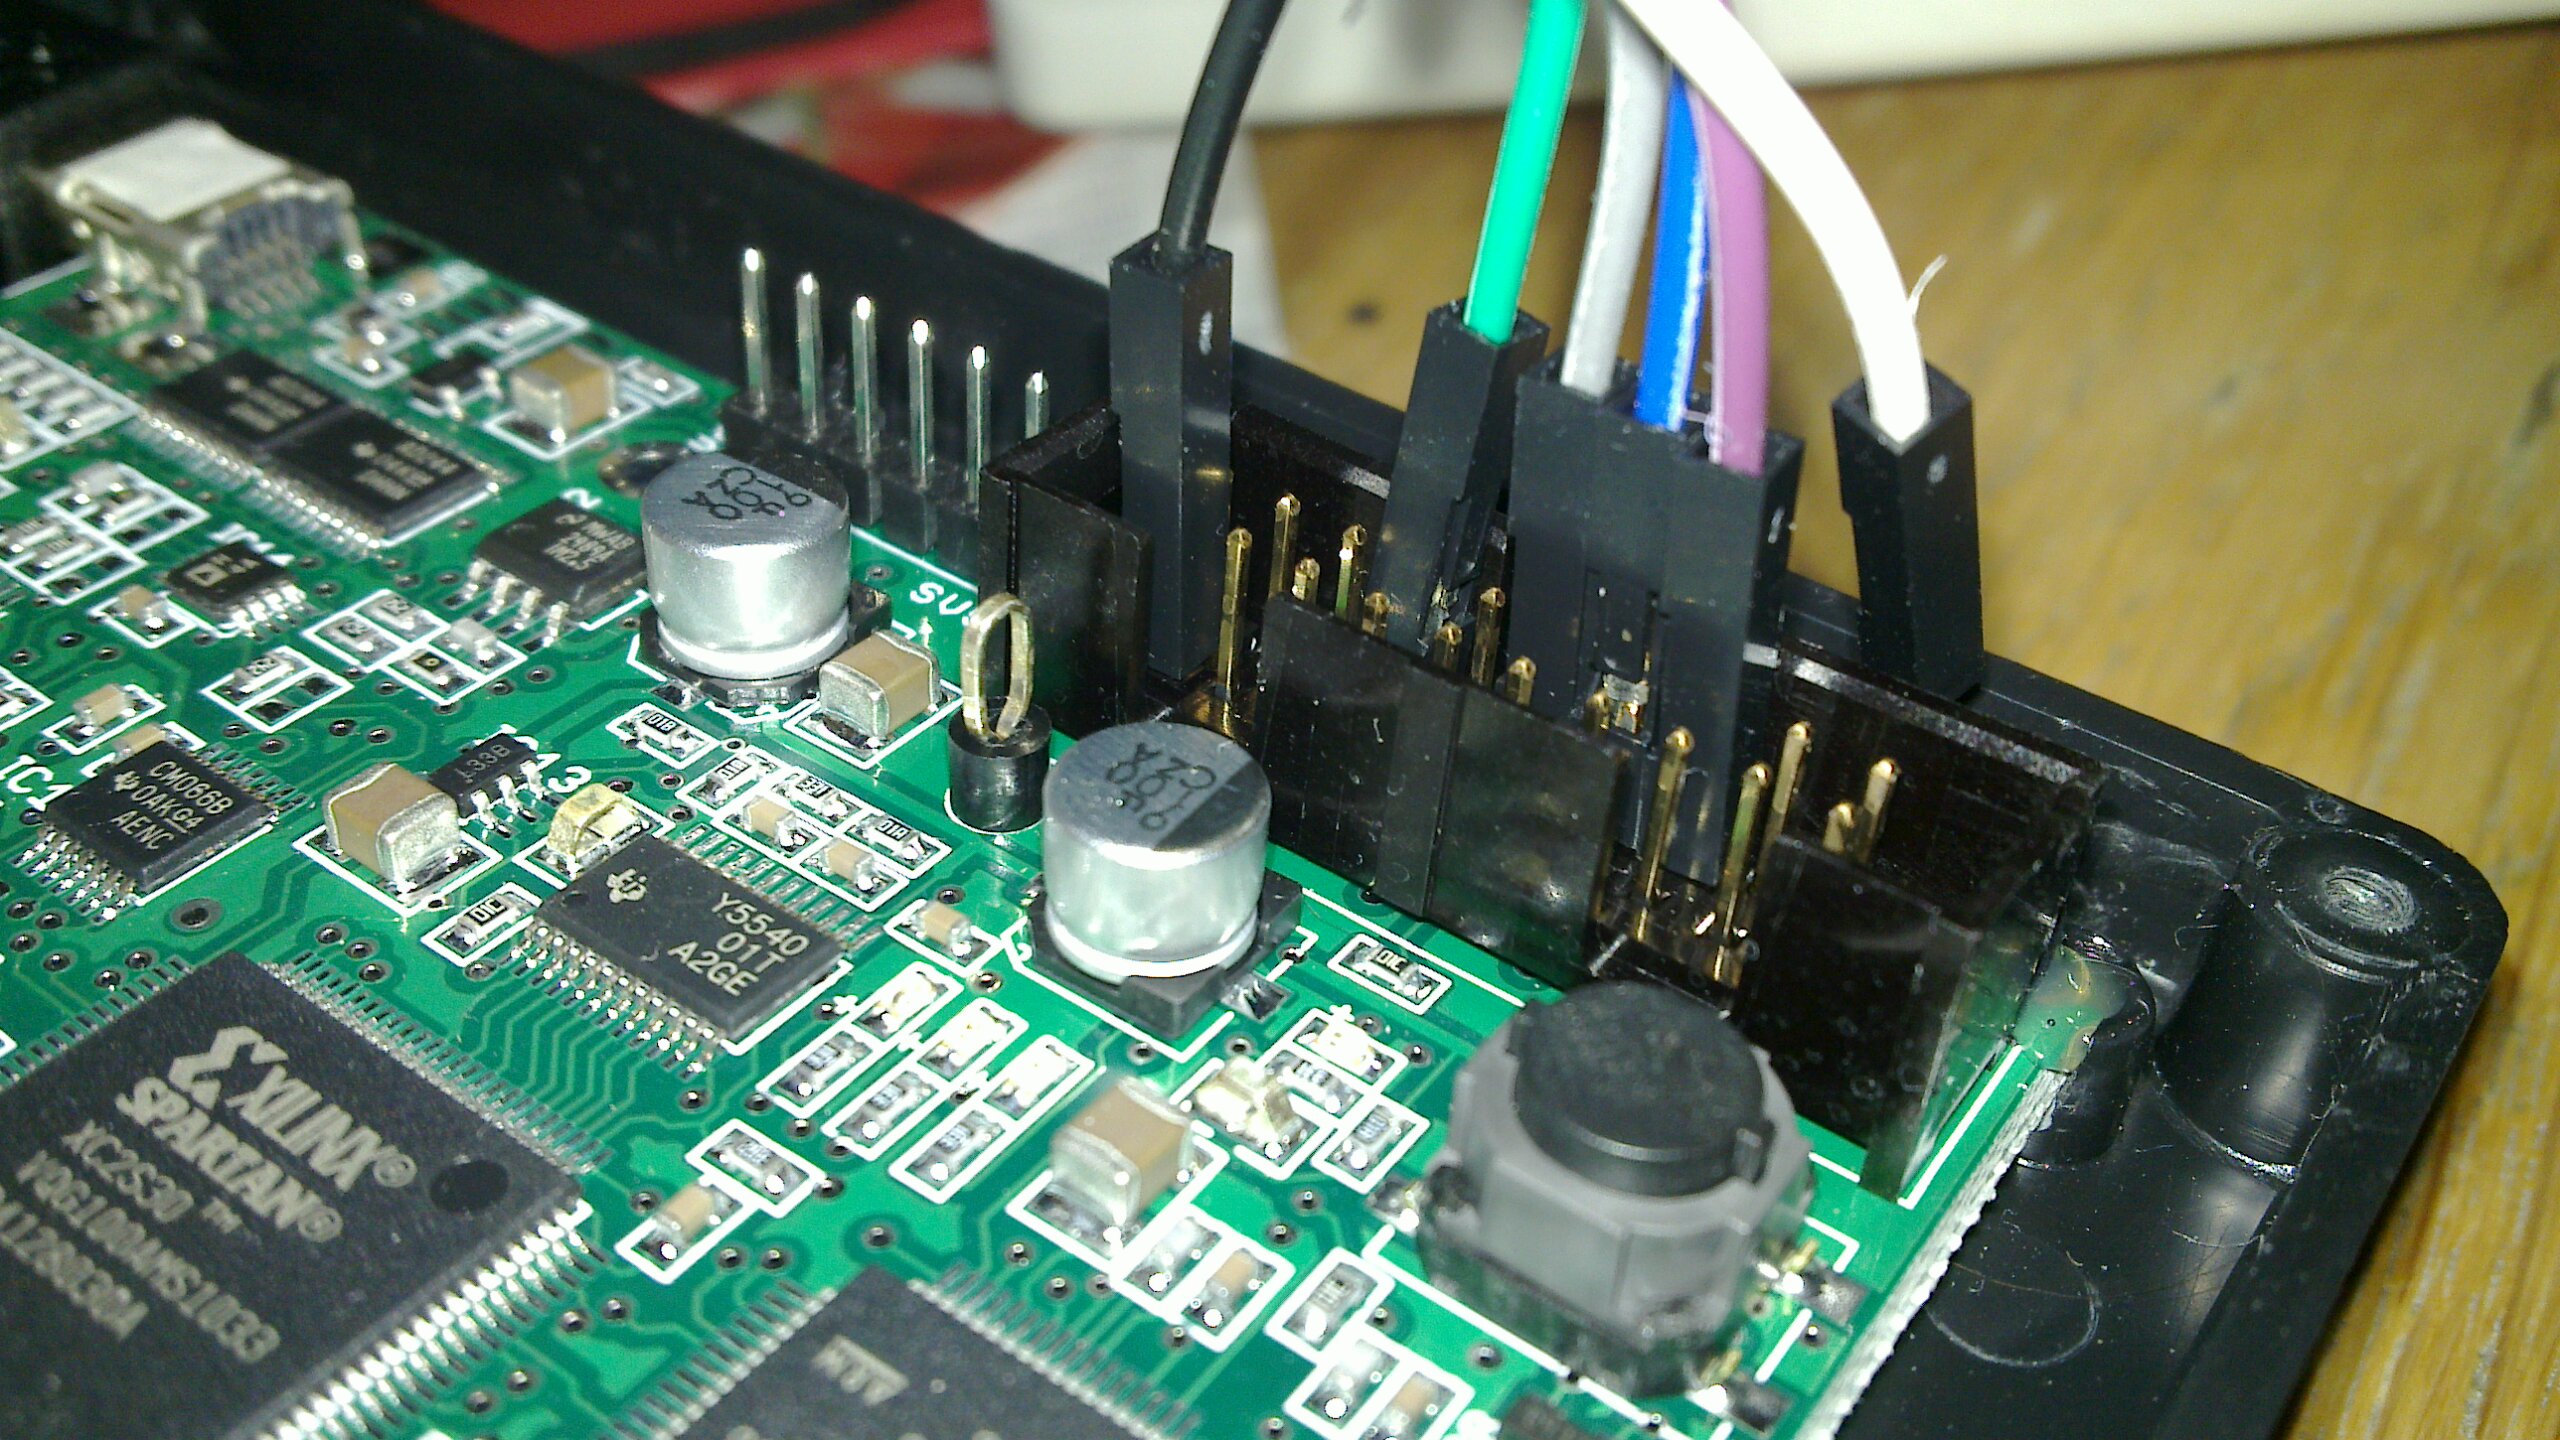
The following is the Bus Pirate pinout together with which JTAG pin you should connect to. I connected GND and the 4 labeled connections on the top: TDO, TMS, TDI, TCK (leaving out VCC, as I powered the Proxmark3 from USB):
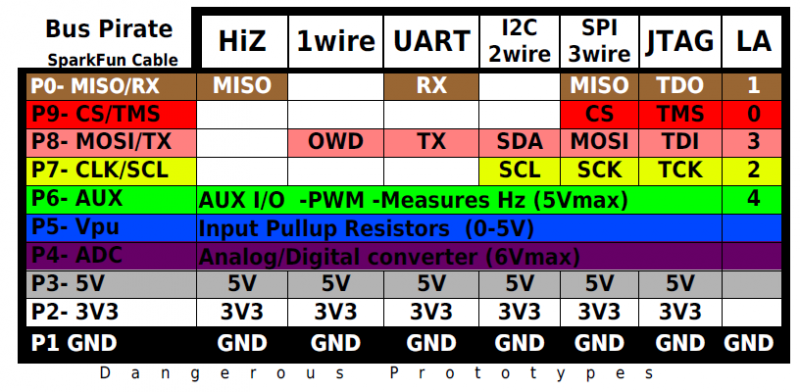
With these connections made, starting up OpenOCD -f at91sam7s512-buspirate.cfg and running telnet localhost 4444 will get you an OpenOCD prompt where you can perform the erase and flash commands listed previously in this post. If something doesn't go as it should, look either to the respective software support channels for help, or perhaps (though it's not as likely due to attention span) we can help you in the comments below.